
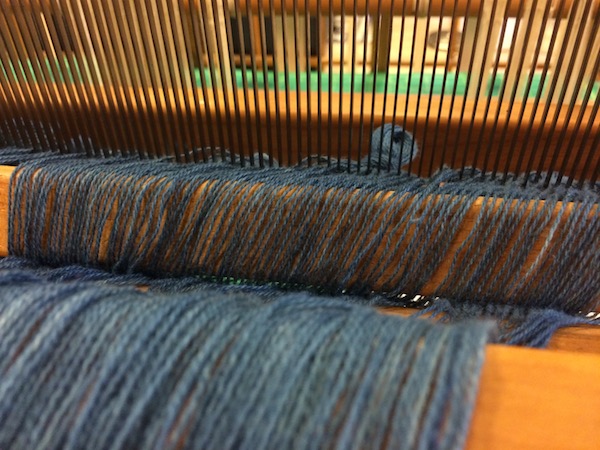
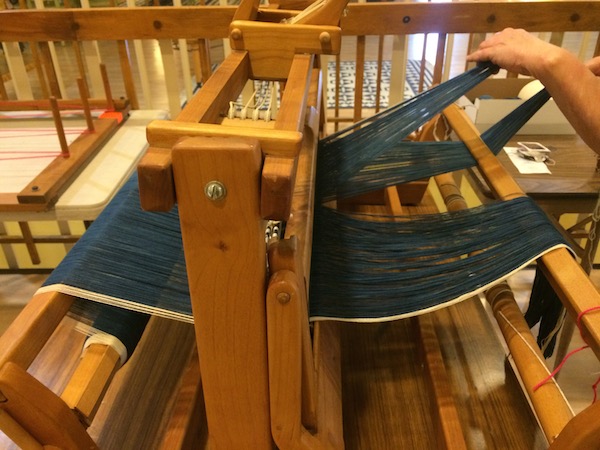
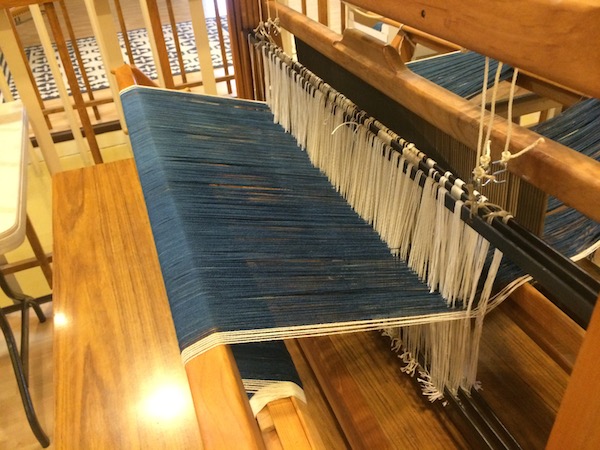
Check out our finished piece of handwoven denim. Beautiful blue, naturally dyed indigo yarns, and a luxurious drape that doesn't come from machine-woven denim. While this piece isn't going to necessarily feel like jeans, it sure is gorgeous.
7. Taking the denim off the loom
6. Weaving denim twill on a table loom
5. Warping the organic cotton yarns on the loom
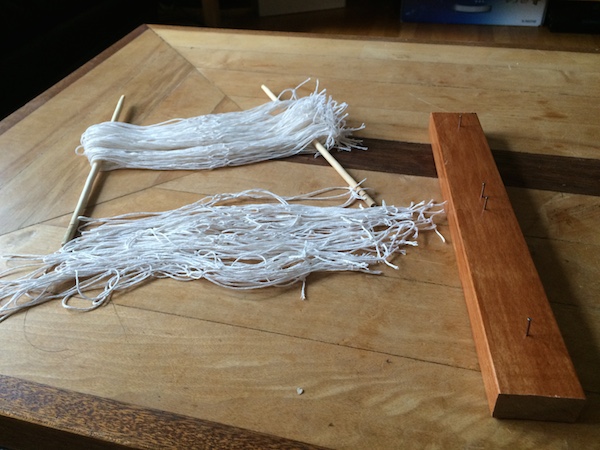

Make new heddles for the table loom before weaving the denim
With our warp wound and counted out, we could finally put the warp onto the loom, the last step before weaving. But wait, upon counting, we discovered that there were only about 300 heddles on the loom, meaning we were 228 heddles short! So new heddles had to be made and fitted on the harnesses. This was easy enough, with a tying frame quickly put together with a small board and 4 nails placed where the knots in the heddles should be, and some carpet warp tied into loops around it, and then fitted onto the harnesses.
Sley the reed with our indigo yarns
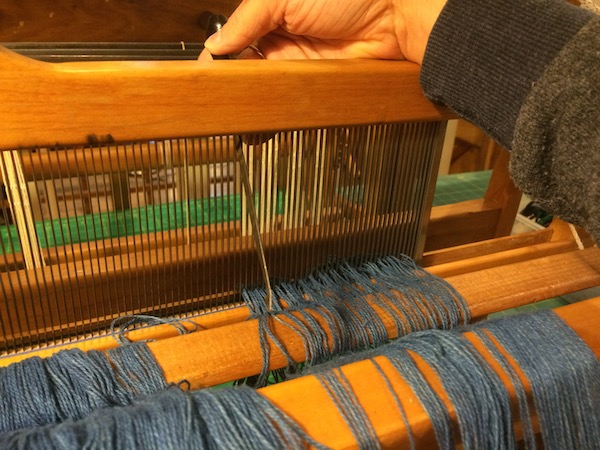
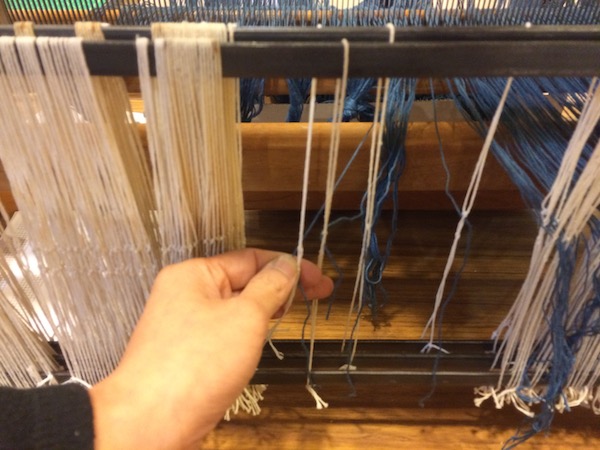
Once the loom was set up, the warp could be threaded through the reed and heddles. This particular table loom has the warp wound on front-to-back, so first we were to sley the reed. This meant placing the wound warp at the front of the loom, with lease sticks inserted into the two sides of the warp cross to keep the cross in place. These sticks were lashed to the loom to prevent them from moving and the beater bar holding the reed pulled forward and secured. Carefully going along the cross from right to left, we used a threading hook to pull three yarns through each dent (opening) on the reed. To prevent any accidental pulling of these yarns, yarns that were already threaded were tied at every ten dents (thirty yarns) with a loose slip knot on the backside of the reed.
After the reed was properly sleyed, the beater was released and the loom turned around so the yarns could now be pulled through the heddles. The heddles connect the warp threads with the harnesses that would be lifted or lowered during the weaving process, determining the pattern possibilities. Each heddle held the warp yarn along a vertical axis through an eye and was tied on both ends to rigid horizontal beams that were then connected to pedals or treadles (hand-operated levers at the top). Denim, being a three by one twill, would only use three harnesses, so the fourth was removed and the heddles transferred to the remaining harnesses.
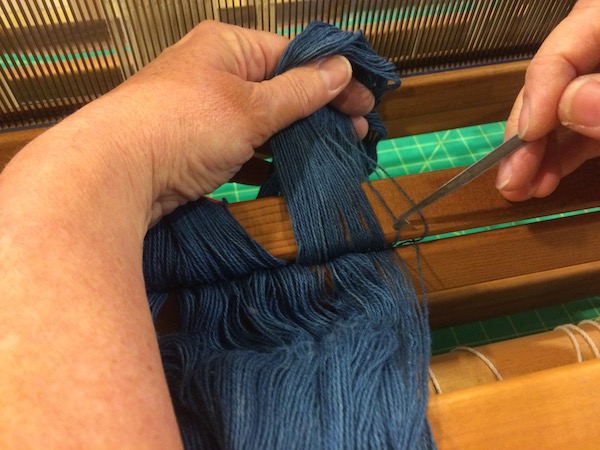
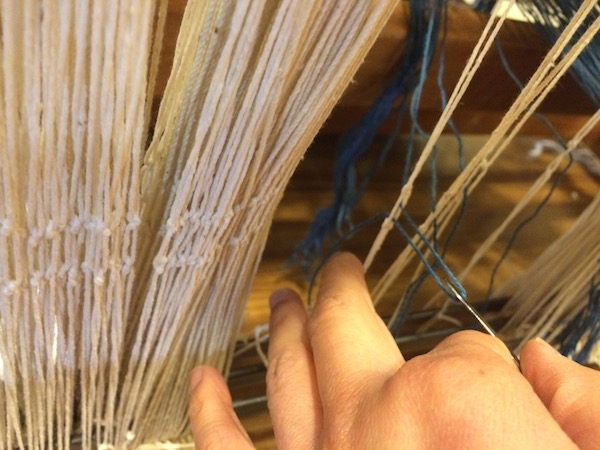
Threading the indigo yarns through the heddles
Starting from the right side, the little bundles we had tied in slipknots were now untied and one by one, they were again hooked through the eye of each heddle. The heddles were threaded sequentially, one through the first heddle on the first harness, then the first heddle on the second harness, and finally the first heddle on the third harness. Because they were three to a dent on the reed, the order in which these three yarns were selected mattered less than making sure no dent was missed as you went along. Special attention had to be paid to avoid missing a yarn as we went along, since that would result in either the tedious process of starting the heddle threading over again, or cutting the yarn and leaving one dent with less than three yarns, which would create a gap in the weave density. At every six heddles, the yarns were pulled so the ends met at the same length, the threading was double-checked to ensure that the heddles were hanging straight and there were no crossovers, and the ends were tied in a double knot.
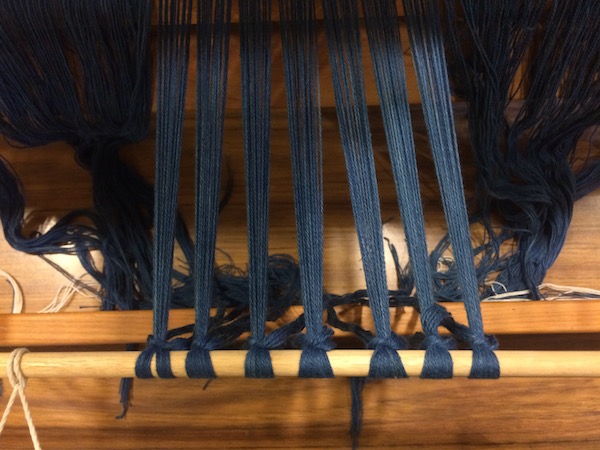
Tighten the indigo warp yarns for weaving denim
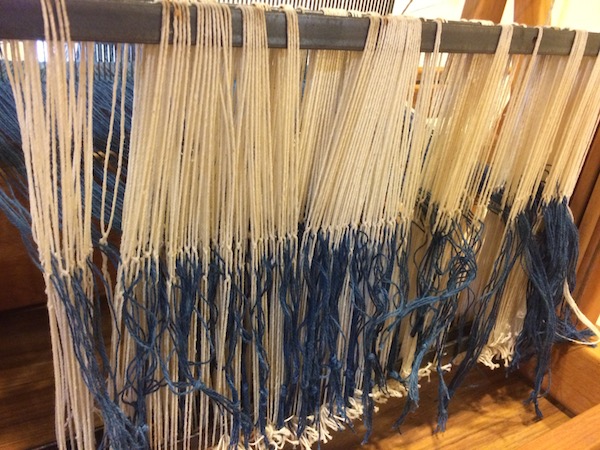
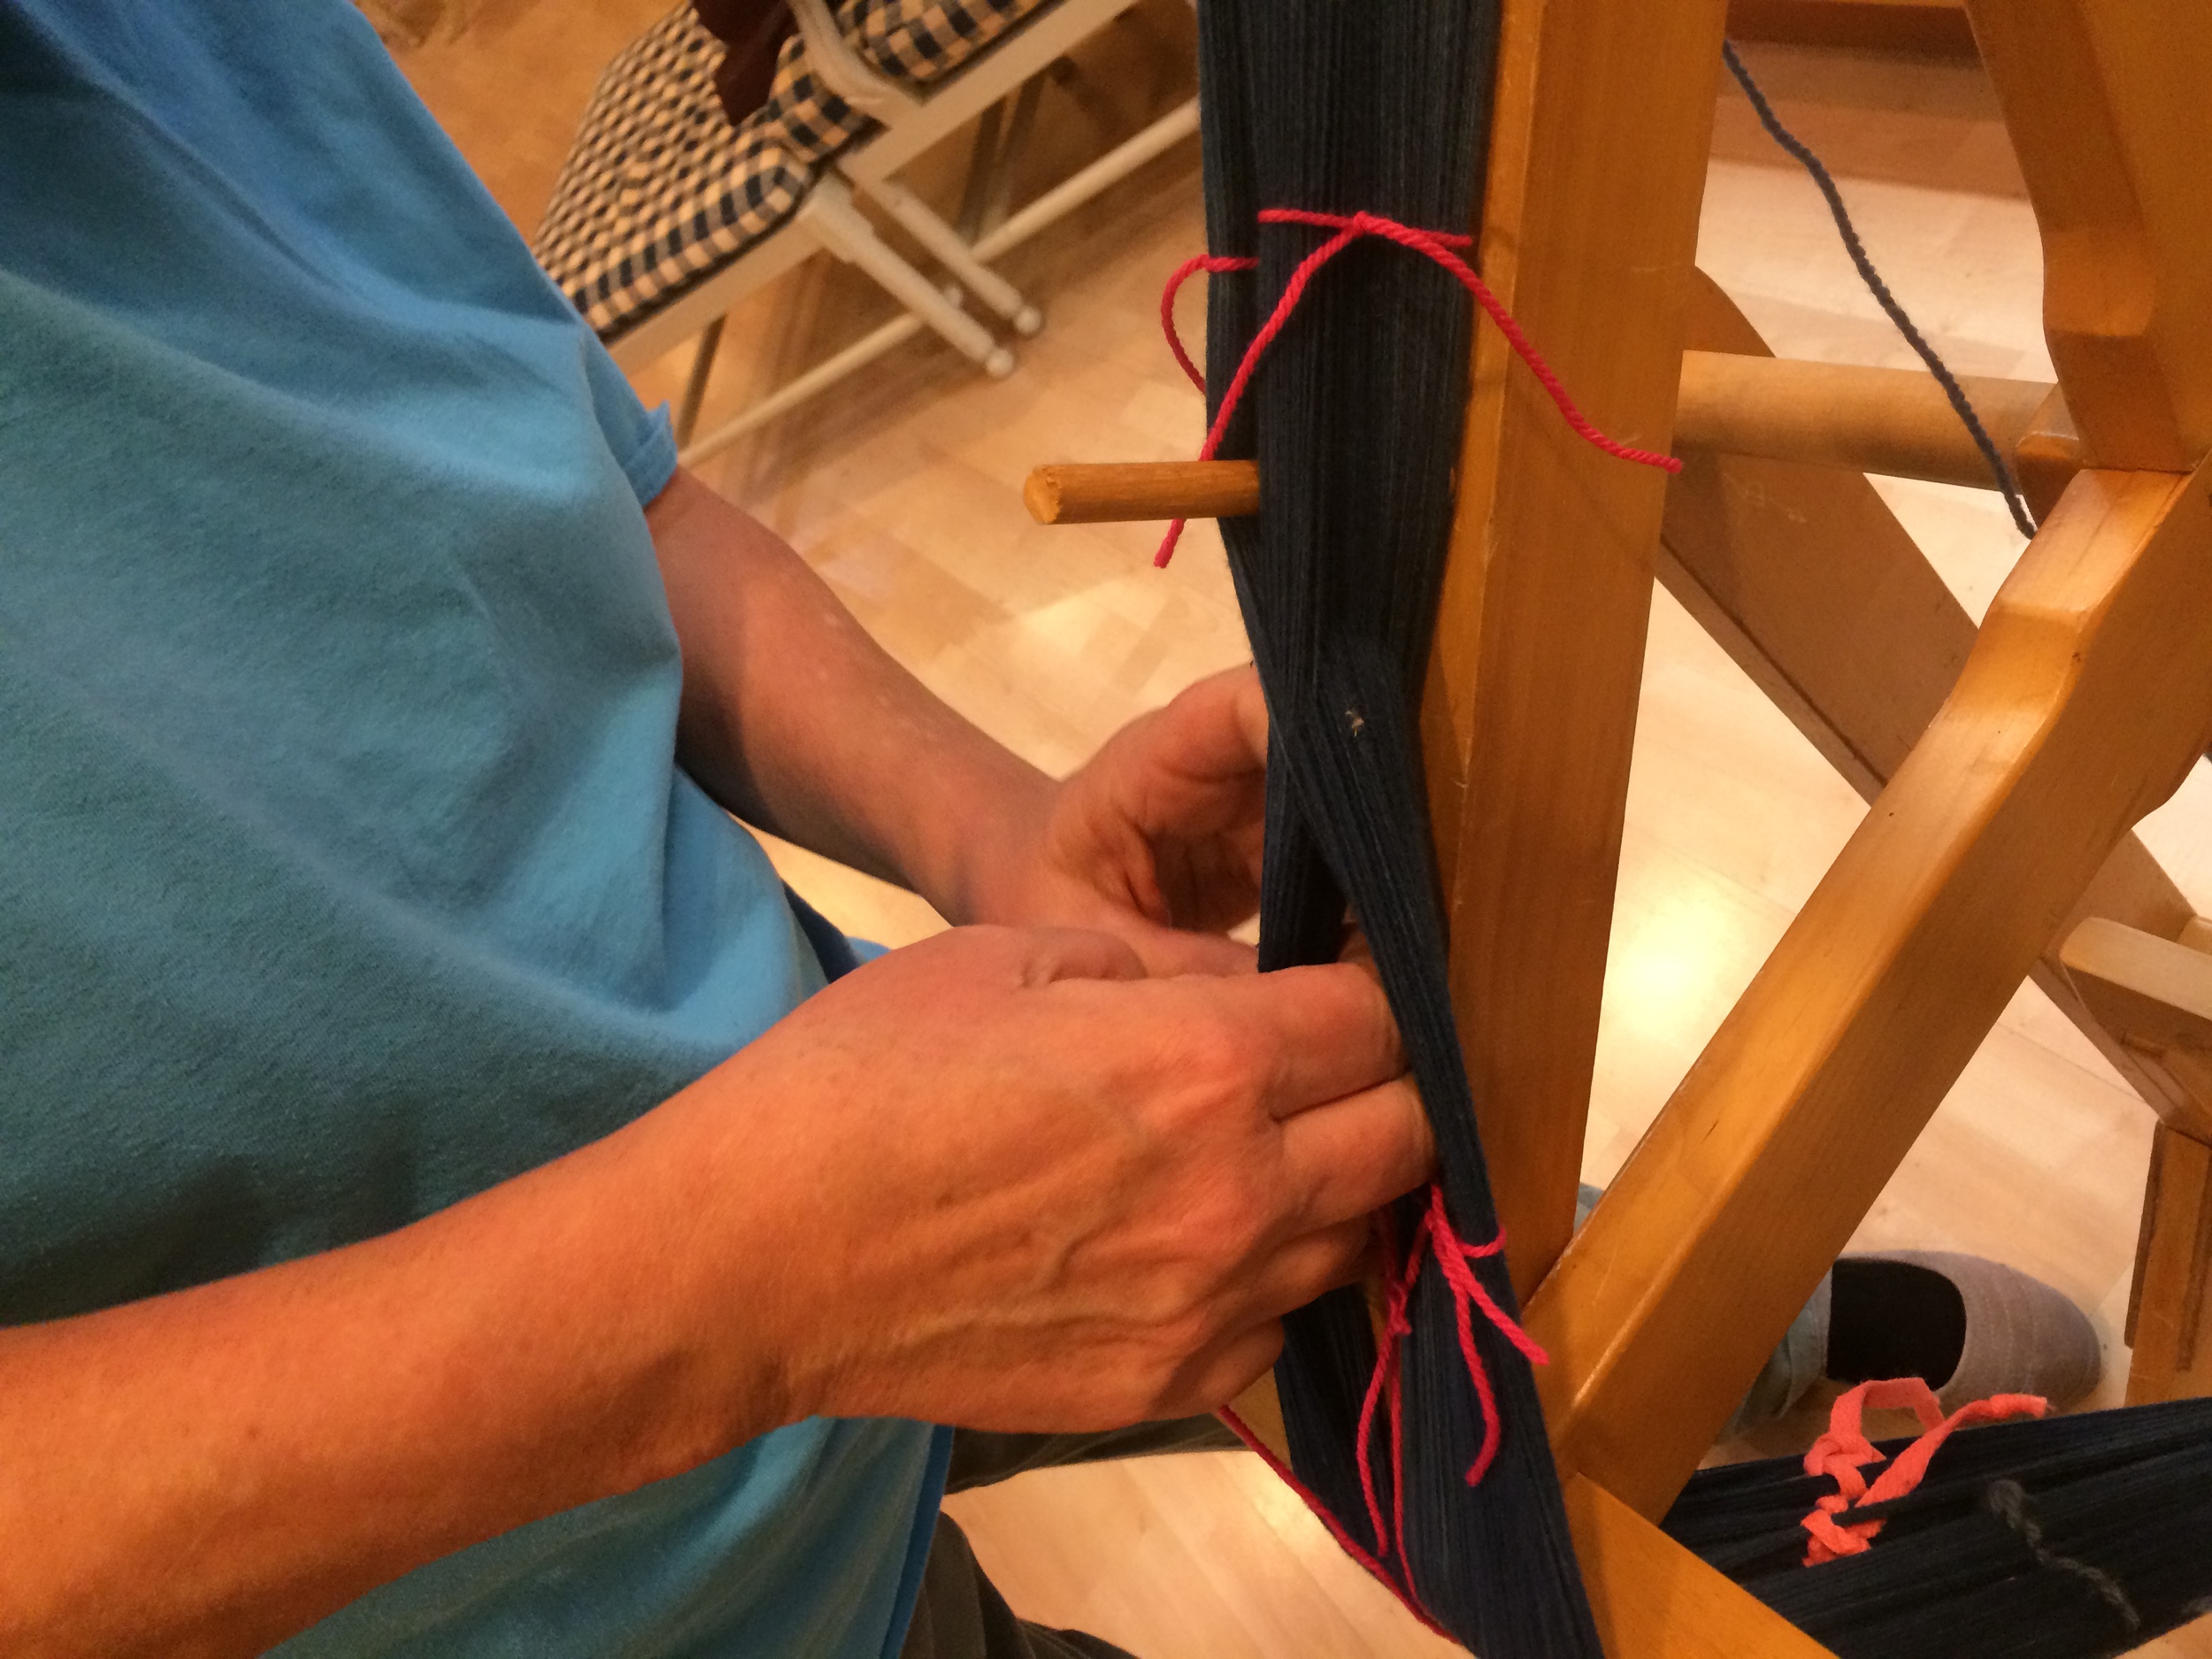
Once all the heddles were threaded and tied off, the warp was centered and tied onto the back beam. The lease sticks were removed from the front cross and the warp was uncoiled. The beam was then turned so the yarns wrapped around the beam, with warp sticks being inserted through the entire warp at every 1/3 turn to keep even tension and prevent tangles. The warp was wrapped until only about 12 inches remained at the front.
To tie the warp onto the front apron rod, the general rule is to hold two bundles of six in each hand (four bundles total) and pull until the tension is even. Then, the bundles in each hand are wrapped over the apron stick, coming up from under and behind the rod and then tied in a tight overhand knot over themselves.
This was first done at both ends of the apron rod to keep it taut. Then, starting from the center and working its way outward towards both ends, we pulled and tied the bundles over the apron rod, keeping as consistent tension as possible and making sure that the reed was centered and all yarns were tied on so they ran straight from the back. Once they were all tied, we lightly touched each section with the back of a hand to test the tension, and tightened or loosened any outliers. When the tension was completely even, the overhand knots on the apron rod were tied into square knots and our warp was tied on!
Now, with a few cranks of the front beam, the warp was tight from back to front, evenly going through each heddle and reed, and ready for weaving!
4. Winding the indigo warp yarns

Organic cotton yarns dyed in indigo, on a warping frame.
The reed we are using on our table loom is 22 inches across, and with 10/2 yarn we will need about 24 yarn per inch, 528 yarns in total for the warp, with a length of 4.5 yards. Now that the yarn was nicely wound into balls, we could start measuring out the 528 yarns for the warp. Typically, hand weavers will use a warping frame to do this, which is a rigid rectangular wooden structure with pegs to wind the yarns around, creating the heddle cross to keep each yarn separate. However, this tool is particularly tedious to use for such a large quantity of yarn, and even when mounted on the wall, requires a great deal of shoulder and back endurance.
Fortunately, our weaving expert Lisa had a warping mill, which performs the same function as the warping frame except that it is a cylindrical shaped structure that rotates around a horizontal axis, thereby allowing the weaver to stand in one place and use the rotation of the frame to do the winding.
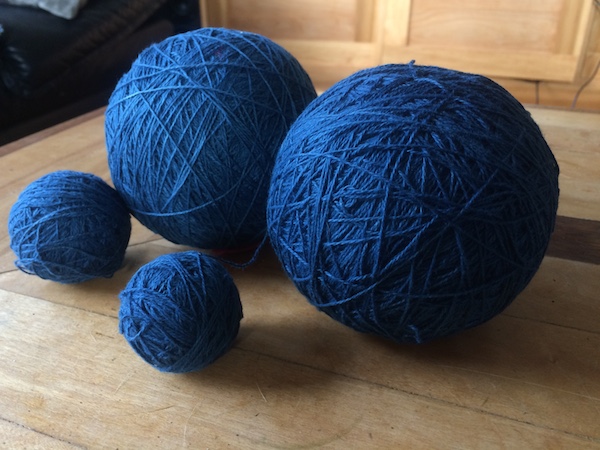
We wound the guide yard around the pegs, measuring out 4.5 yards and before winding the yarn back in the opposite direction. Then we tied on the end of the indigo-dyed yarn that had been neatly wound into a ball into the upper peg, and holding the yarn in my right hand to keep the tension, began turning the barrel of the mill.
Lisa advised us to wind all the warp at once, or at least, not leave any yarn on the mill to be continued the next day. It is important to keep the tension on the yarn consistent as you wind, to prevent length discrepancies. And to leave it on the mill for even a day makes it susceptible to loosening or even changes in your own mood, which might alter the tension.
I stood there for 3 hours turning the mill and winding the warp, with the yarn cutting through my right finger as it slid across. At every 22 yarns, I would tie two counting strings on either side of the cross to keep track of how many yarns I had tied. After the three hours, I had a beautifully long skein of indigo yarns, each strand individually combed. Lisa tied some secure ties at every few inches of the warp to prevent it from coming apart or moving, and then slipped the whole loop off of the mill. She put one end over her wrist and pulled the rest of the loop through, forming a loose chain to keep the yarns manageable, and we put it to the side to be put on the loom the next day.
Tying off the yarns on warping frame.
Untangling our indigo yarn
Organic cotton yarn hand dyed in indigo.
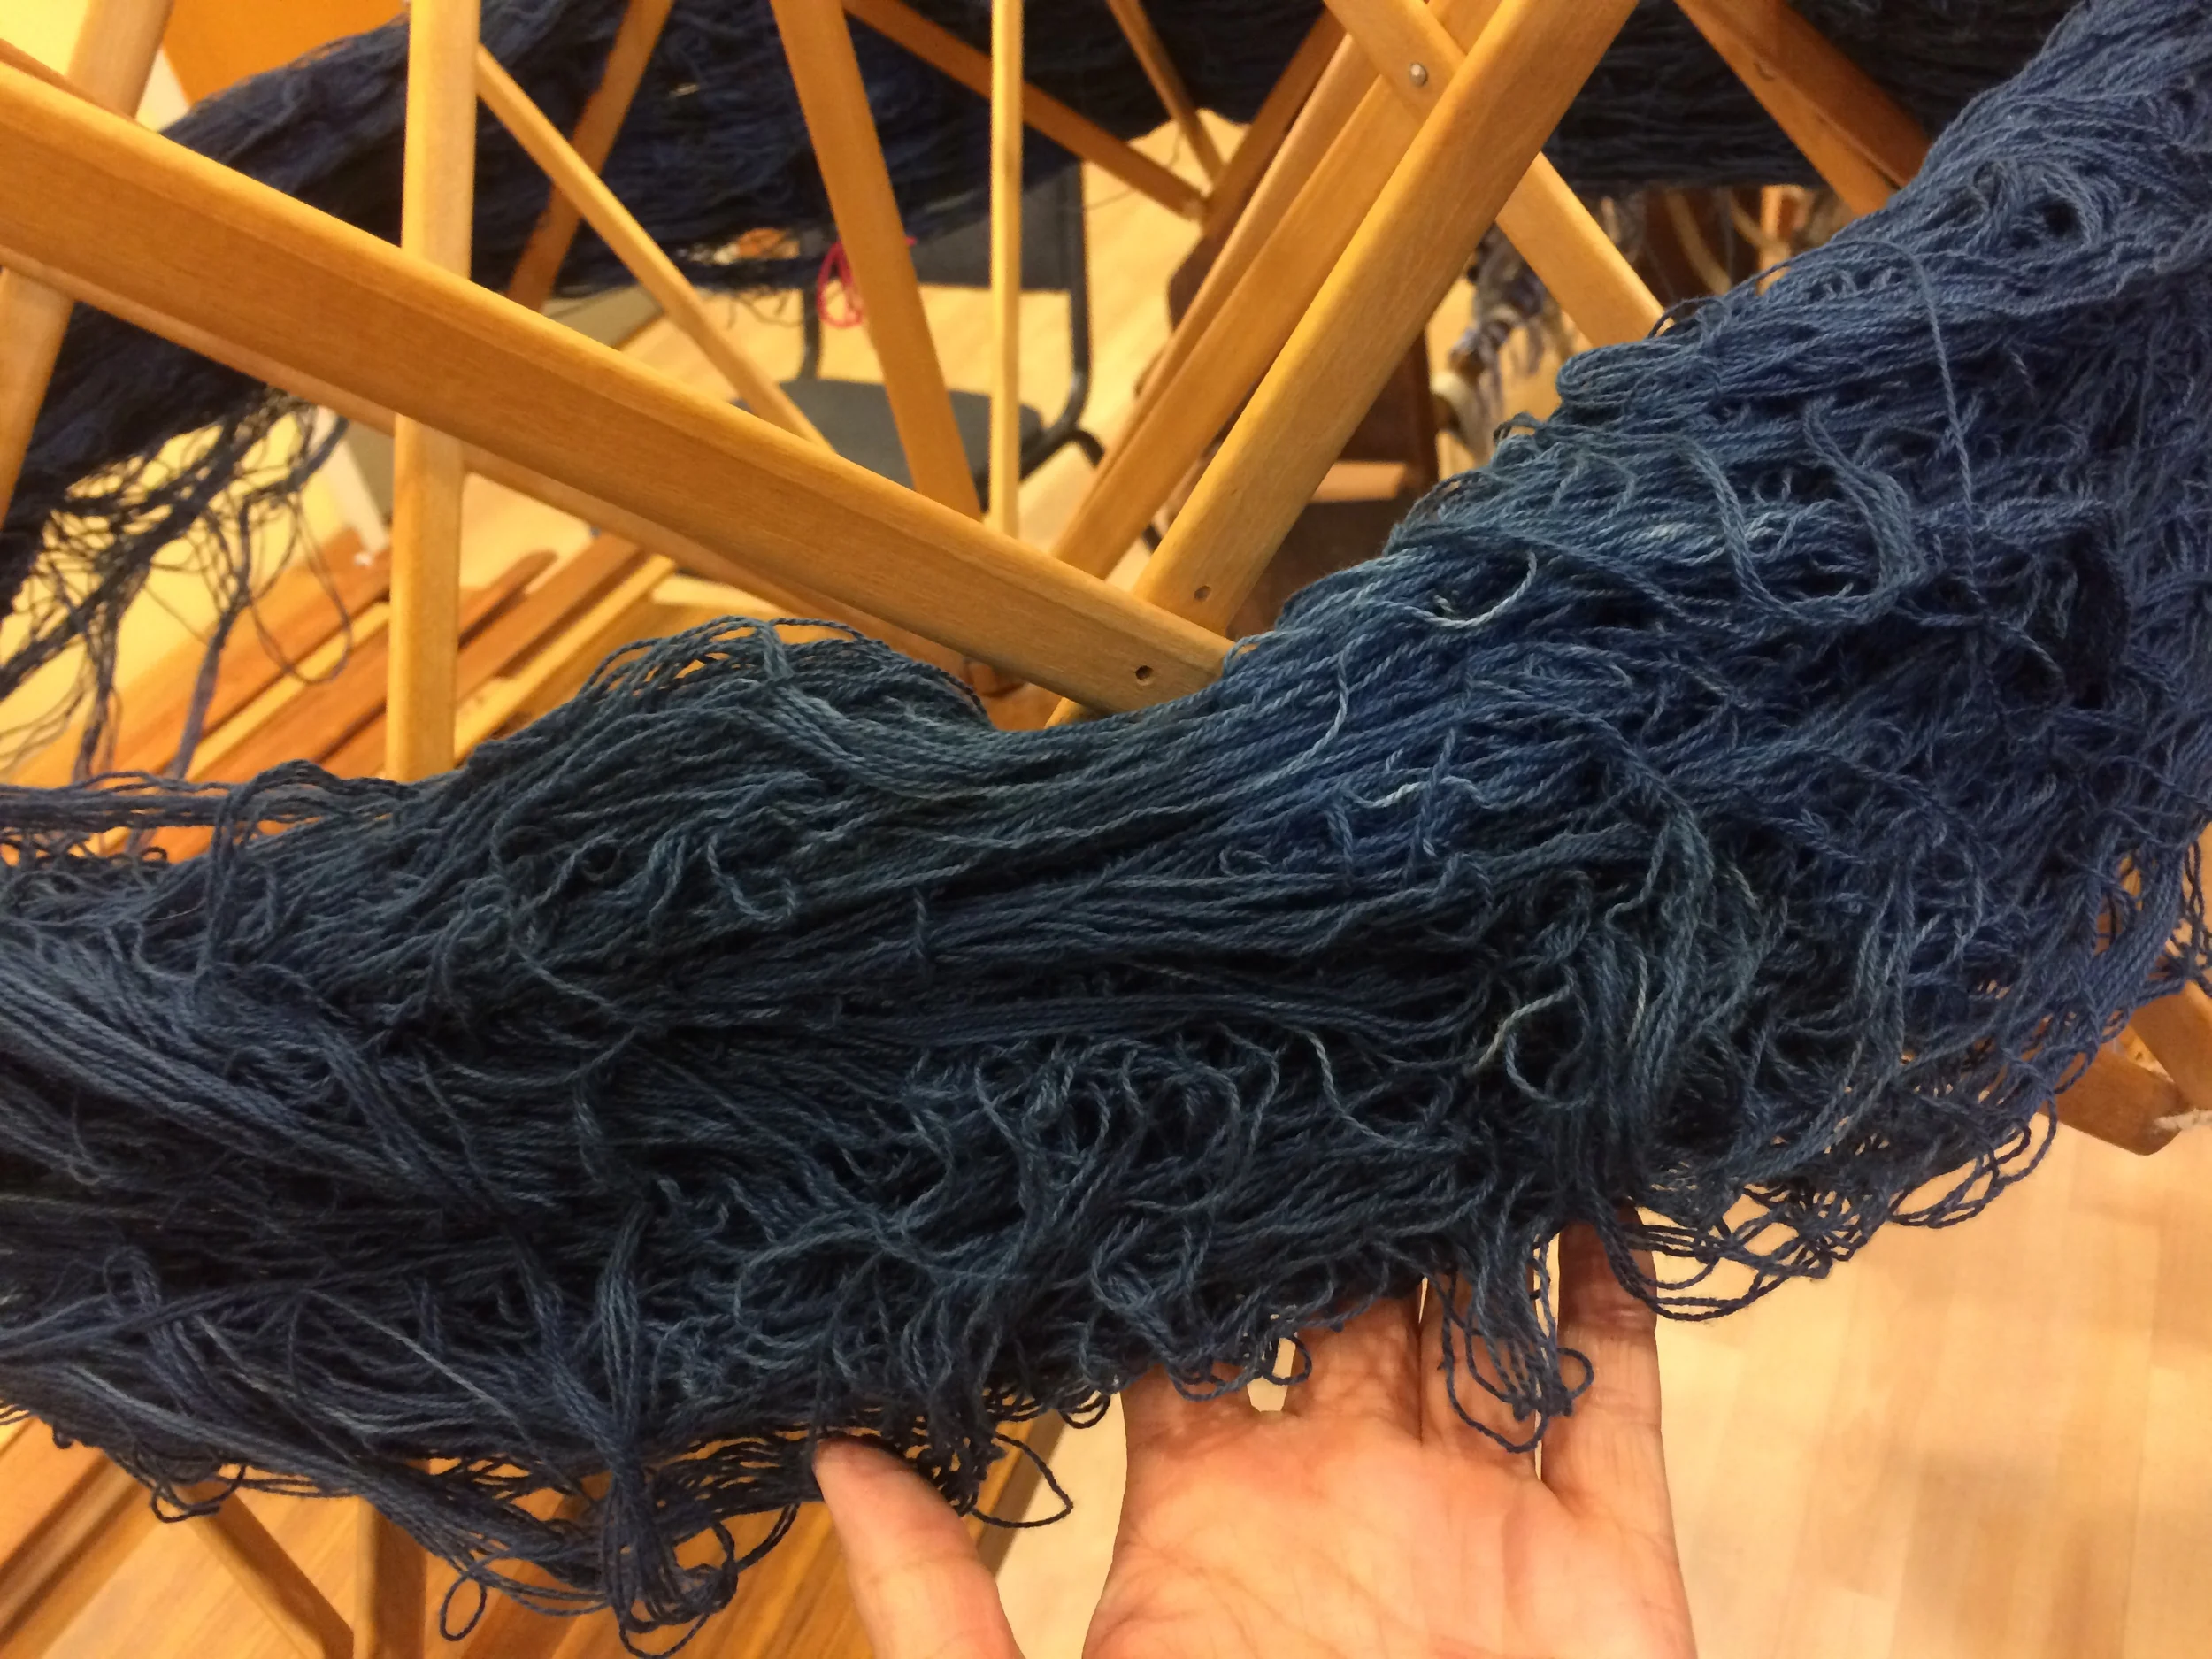
After suffering through days and nights of wrestling with tangled messes of blue yarn on my lap, breaking fingernails picking apart tight knots, turning my hands indigo and listening to the many well-intentioned but condemning suggestions to "maybe give up and start over", "wouldn't it be faster?", and finally the eye-rolling and "good luuuck" said in that singsong tone of incredulity...a month and a half later after the yarn was revealed to be a hot tangled mess, we finally, finally managed to untangle it.
There were, as with all miserable experiences, some lessons to be learned from this ordeal. The number one being patience. Had I been more patient and double-checked my work when tying the hanks to begin with, they might have remained in the neat, organized loops the hanks were designed for. Had I just been patient and waited to put the yarn on a swift, instead of trying to comb through it with my hands on a table and getting inner loops tangled onto outer loops, we might have been able to prevent the knots that formed. And finally, in untangling the yarn once it's on a swift, one cannot rush it by by tugging on the yarn, which inevitably causes overlapping yarns to tighten on themselves. Nor should one attempt to follow the yarn through loops that are seemingly in the way, as that unintentionally threads a new knot where there wasn't one before.
Because there was no actual knotting occurring in this yarn, at least at the outset. No actual yarn ends crossed over and under each other. Rather, certain looser yarns had fallen over other yarn loops and then been tightened until the yarn at the very bottom couldn't move, though they were all still running parallel. Instead of tugging or dodging a loop whenever the yarn hit a blockage, all one had to do was lightly shake the yarn at the center and lightly loosen the other yarns lying on top to release their hold. Once loosened, the yarn would continue to move along the swift, unwinding as it went along, without causing any disruption in the orientation of the other yarns.
For us, because one of our skeins had gotten hopelessly knotted upon itself, we ultimately had to carefully cut one yarn at a time and wind the loose ends until they hit another roadblock, carefully accounting for all loose ends until finally, one yarn was identified that could go around the rest of the unaffected skein without getting caught up in the knot. Finding this yarn took about a week. Once identified, the winding went more or less smoothly, being careful not to get all the other dangling yarn bundles tangled even more on each other.
Oops, tangling our indigo yarn hanks

our organic cotton yarn hand dyed in indigo
With the yarn dyed and fully dry, everything was ready for us to start putting it on a loom. In order to prepare the warp, we needed to first wind the yarn onto a warping frame (also known as a warping board), to measure out consistent lengths in yarn to be tied later onto the loom. As we took our dyed skeins of yarn out to be wound, it became apparent that this was not going to be easy.
I had mistakenly tied the figure eight loops meant to hold the separate skeins together at the wrong places, which means there were yarns from one skein crossing over into another, and when they had been dipped into a dye bath, they had become a whole tangled mess. We tried to salvage it by putting it on a swift. But first we needed to find the ends of the yarn to prevent further entanglement. I had further neglected to tie a different yarn at the ends so that they would be recognizable from a mile away, so needless to say we were looking for a tiny double knot that was dyed, like everything else, blue. Miraculously, after a thirty minute needle-in-haystack search, we managed to find the ends and snipped them open to begin unwinding.
But it was of no use. The yarn had become so tangled upon itself that every pull of the end caused some other part of the hank to tighten, and the only option we were left with was to painstakingly untangle each yarn until we reached what we guessed to be four yards, and then to cut it off and tie it to the warping board. After two hours, I had tied on five warp yarns.
Tomorrow I will try and see if the other hanks are any less tangled than this. If not, we may have no choice but to start over from the beginning.
Oops. Our organic indigo yarns have become tangled.

3. Dyeing with fermented indigo baths in Portland

Yarn hanks soaked overnight, untwisted, and washed again in water.

Slowly lowering the yarn into the fermented indigo vat, careful not to disturb the vat. K

Keeping the yarn under the indigo bath, we carefully move the yarn strands to ensure that all sides are coming into contact with the indigo dye. After about 7 minutes (or the equivalent of one Van Morrison song, as Joel puts it), we squeeze the excess dye out while it is still under the liquid, and then bring it out into the air. At first glance, it's a bit turquoise-green.

A few seconds in the air, and the indigo oxidizes to a deep, rich blue.

After hanging it to dry for a few minutes, the yarn goes back into the vat for another wash. And rinse, lather, repeat three to seven times.

Hanging the yarn up overnight.

Rinsing the yarn three times to wash out the excess dye. The yarn still stays a surprisingly deep hue of blue. Eventually, we'd like to reach a point where the extra washes and rinses wouldn't be necessary. For now, it's a learning process.
2. Winding and tying the cotton yarn into hanks

Before dyeing, yarns must be looped and tied into a skein and then wrapped into a hank. Basically, we needed to get our yarn off of the cone it came on, yet still keeping every yarn loose enough for the dye to get in, without becoming tangled. The process is pretty straightforward, but arduous. Lisa from the Swedish Cultural Center lent us her swift, an apparatus that clamps to a table and opens like an umbrella to your desired width. You tie one end of the yarn onto a joint on the swift, place the cone on the floor, and then lightly guiding the yarn in one hand, you use your other to spin the swift around its center access, winding the yarn around circumference of the swift.
Because it is cone yarn, the yarn comes easily off the top of the cone, otherwise if it was a spool, it would need to be hung in a place where it could spin freely. I stood there for 3 hours just spinning the swift and watching the loop of yarn grow. Once the loop has reached about 2 inches thick, tied it with a figure eight piece of yarn in four places, and collapsed the center of the swift.
Taking the two ends of the loop, we twisted it until it was tight, and then brought the ends together so it twisted into a thick hank. We tucked one end into the other, and we were ready to go!

Two cones of yarn, 2 pounds total, produced 4 hanks.
1. Finding the right organic cotton yarn

The first step was to find our yarn. We had considered spinning the yarns from the raw cotton fiber, but given that organic, unbleached cotton yarns already exist on the market, we figured it would be better to support these businesses.
We knew we wanted organic cotton. But what about the rest of the details? Just as with every step of this process, there were a number of different factors to consider.
Yarn Weights and Plys
All denim is woven with a 3/1 warp facing twill, and denim, being heavier and tougher than most fabrics, requires a thicker yarn than most. When sizing yarn, the simplest and most widespread way in the spinning industry to describe yarn size is to use English Cotton Count, abbreviated with Ne.
The first number after Ne is the yarn weight, which is calculated by how many 840 yard lengths of the yarn there are in one pound. (The reason for that number being that there are typically 840 yards in a dyeing hank). Therefore, the lower the number, the heavier or thicker the yarn. Lighter textiles start at around Ne 12 or 12.5.
The second number that often accompanies yarn size descriptions is the ply count. This means how many separate strands are spun together to form one yarn. It is the final yarn that is used to calculate the above yarn weight number. Ply count signifies a stronger yarn, not necessarily a heavier yarn. Single plies are represented either by a "/1" or a lowercase s after the yarn weight. All other plies are written as a "/" and then a number.
Ne 10s means there are 8,400 yards in a pound of yarn, and the yarn is a single strand.
Ne 12/2 means that there are 10,080 yards in a pound, and the yarn consists of two strands twisted together.
Yarn Weights for Denim
Typically, denim uses yarns from Ne 4s to Ne 12s (4 being quite heavy and 12 being more similar to what you'd see a tablecloth woven out of). The "s" that follows each number indicates that the yarns are a "single-ply", or only one strand of fiber makes up the yarn. This is most likely an industrial standard, as machine looms can handle single-ply yarns without much issue. However, when hand looming, using a single ply is generally not recommended, due to the likelihood of breakage. It is also extremely difficult to find individual cones of single ply that aren't industrial sized minimums. 2-ply would be just as thick and heavy as a one-ply, only stronger.
The yarn we ultimately selected was an Ne 10/2 cotton yarn. This weight would be thick enough to make a sturdy denim without being too heavy.
Organic Cotton
The yarn purchased for this particular project was 50% organic and 50% EZ Dye cotton, also known as Dye-Lishus Cotton Yarn. It's your typical 10/2, ring-spun, carded cotton yarn with one twist. It doesn't take any additional mordant or treatment to bind to the dye. The concept was brought to the hand-weaving community by a woman named Eileen Hallman of New World Textiles. The EZ Dye aspect of the yarn is achieved by adding a molecule to the cotton cellulose that attracts and bonds to dye molecules. This process occurs even before the cotton has been spun into yarn. As a pre-mordanted yarn, the cotton no longer requires salt, washing soda, or other treatment chemicals. More dye is taken up by the yarn, reducing dye and chemicals in the waste water, and less rinsing is needed after dyeing.
While the yarn was great and yielded a nice color after dyeing, in retrospect, we probably could have gone with a 100% organic cotton yarn, without the EZ Dye element. Indigo dye, as we soon learned, does not require a mordant on the fiber to bind to the yarn. More on that in the next post.