
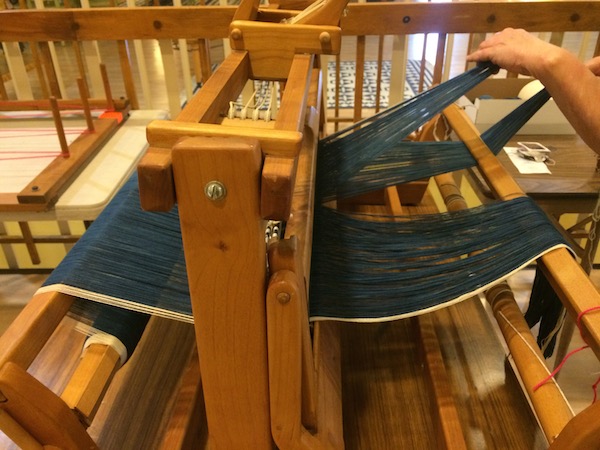
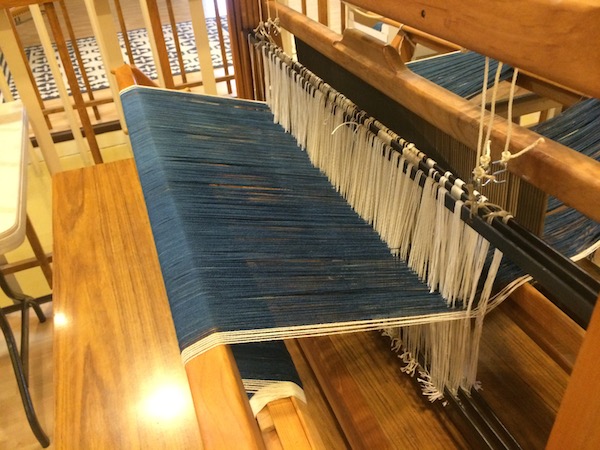
After months of running the shuttle back and forth, we've finally finished our five yards of handwoven denim. Take a look at the results as we take the piece off the loom.
6. Weaving denim twill on a table loom
5. Warping the organic cotton yarns on the loom

Make new heddles for the table loom before weaving the denim
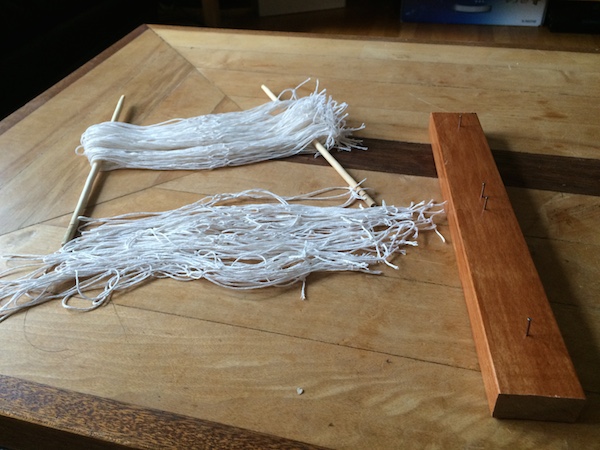
With our warp wound and counted out, we could finally put the warp onto the loom, the last step before weaving. But wait, upon counting, we discovered that there were only about 300 heddles on the loom, meaning we were 228 heddles short! So new heddles had to be made and fitted on the harnesses. This was easy enough, with a tying frame quickly put together with a small board and 4 nails placed where the knots in the heddles should be, and some carpet warp tied into loops around it, and then fitted onto the harnesses.
Sley the reed with our indigo yarns
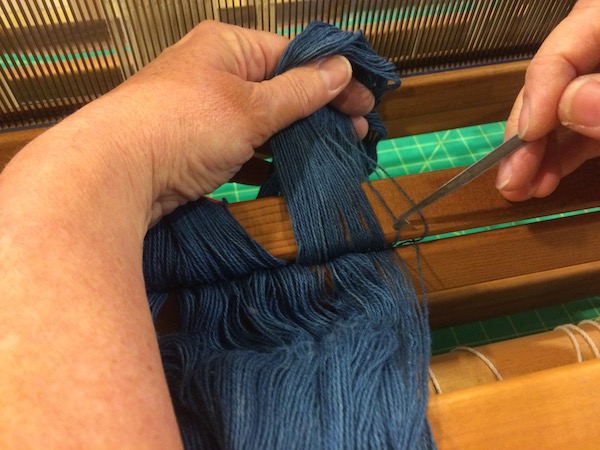
Once the loom was set up, the warp could be threaded through the reed and heddles. This particular table loom has the warp wound on front-to-back, so first we were to sley the reed. This meant placing the wound warp at the front of the loom, with lease sticks inserted into the two sides of the warp cross to keep the cross in place. These sticks were lashed to the loom to prevent them from moving and the beater bar holding the reed pulled forward and secured. Carefully going along the cross from right to left, we used a threading hook to pull three yarns through each dent (opening) on the reed. To prevent any accidental pulling of these yarns, yarns that were already threaded were tied at every ten dents (thirty yarns) with a loose slip knot on the backside of the reed.
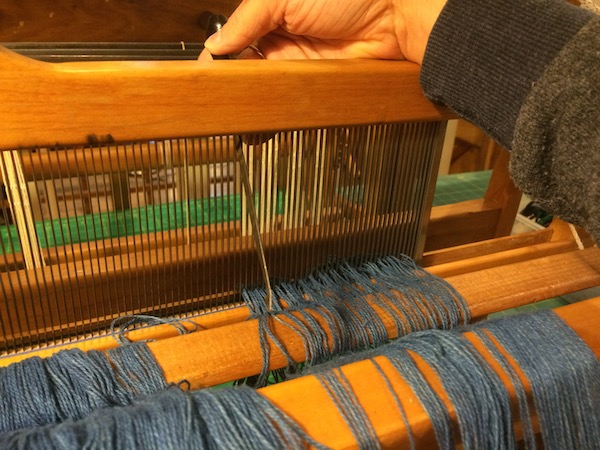
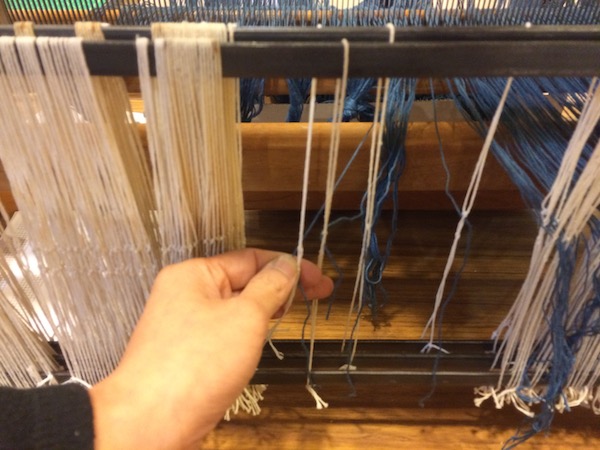
After the reed was properly sleyed, the beater was released and the loom turned around so the yarns could now be pulled through the heddles. The heddles connect the warp threads with the harnesses that would be lifted or lowered during the weaving process, determining the pattern possibilities. Each heddle held the warp yarn along a vertical axis through an eye and was tied on both ends to rigid horizontal beams that were then connected to pedals or treadles (hand-operated levers at the top). Denim, being a three by one twill, would only use three harnesses, so the fourth was removed and the heddles transferred to the remaining harnesses.
Threading the indigo yarns through the heddles
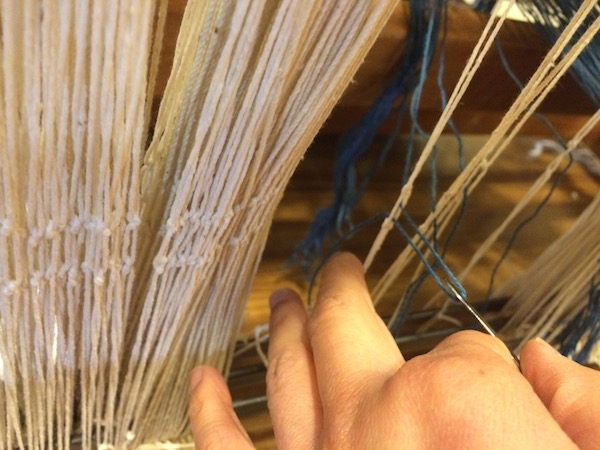
Starting from the right side, the little bundles we had tied in slipknots were now untied and one by one, they were again hooked through the eye of each heddle. The heddles were threaded sequentially, one through the first heddle on the first harness, then the first heddle on the second harness, and finally the first heddle on the third harness. Because they were three to a dent on the reed, the order in which these three yarns were selected mattered less than making sure no dent was missed as you went along. Special attention had to be paid to avoid missing a yarn as we went along, since that would result in either the tedious process of starting the heddle threading over again, or cutting the yarn and leaving one dent with less than three yarns, which would create a gap in the weave density. At every six heddles, the yarns were pulled so the ends met at the same length, the threading was double-checked to ensure that the heddles were hanging straight and there were no crossovers, and the ends were tied in a double knot.
Tighten the indigo warp yarns for weaving denim
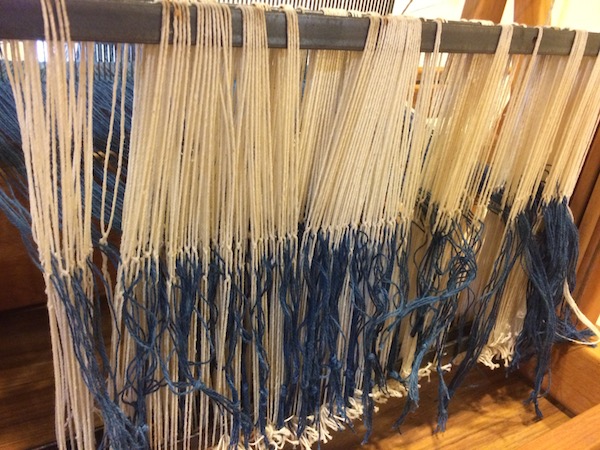
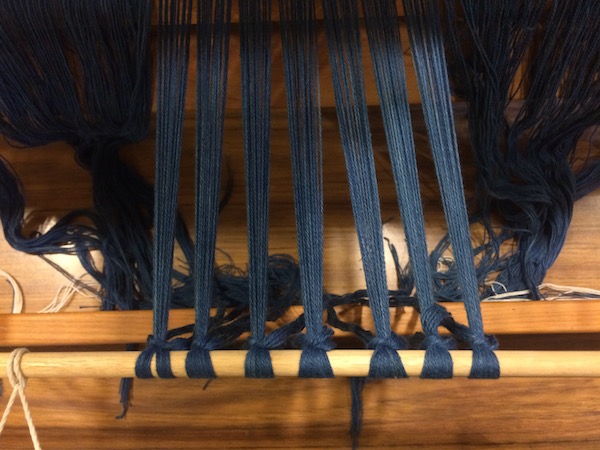
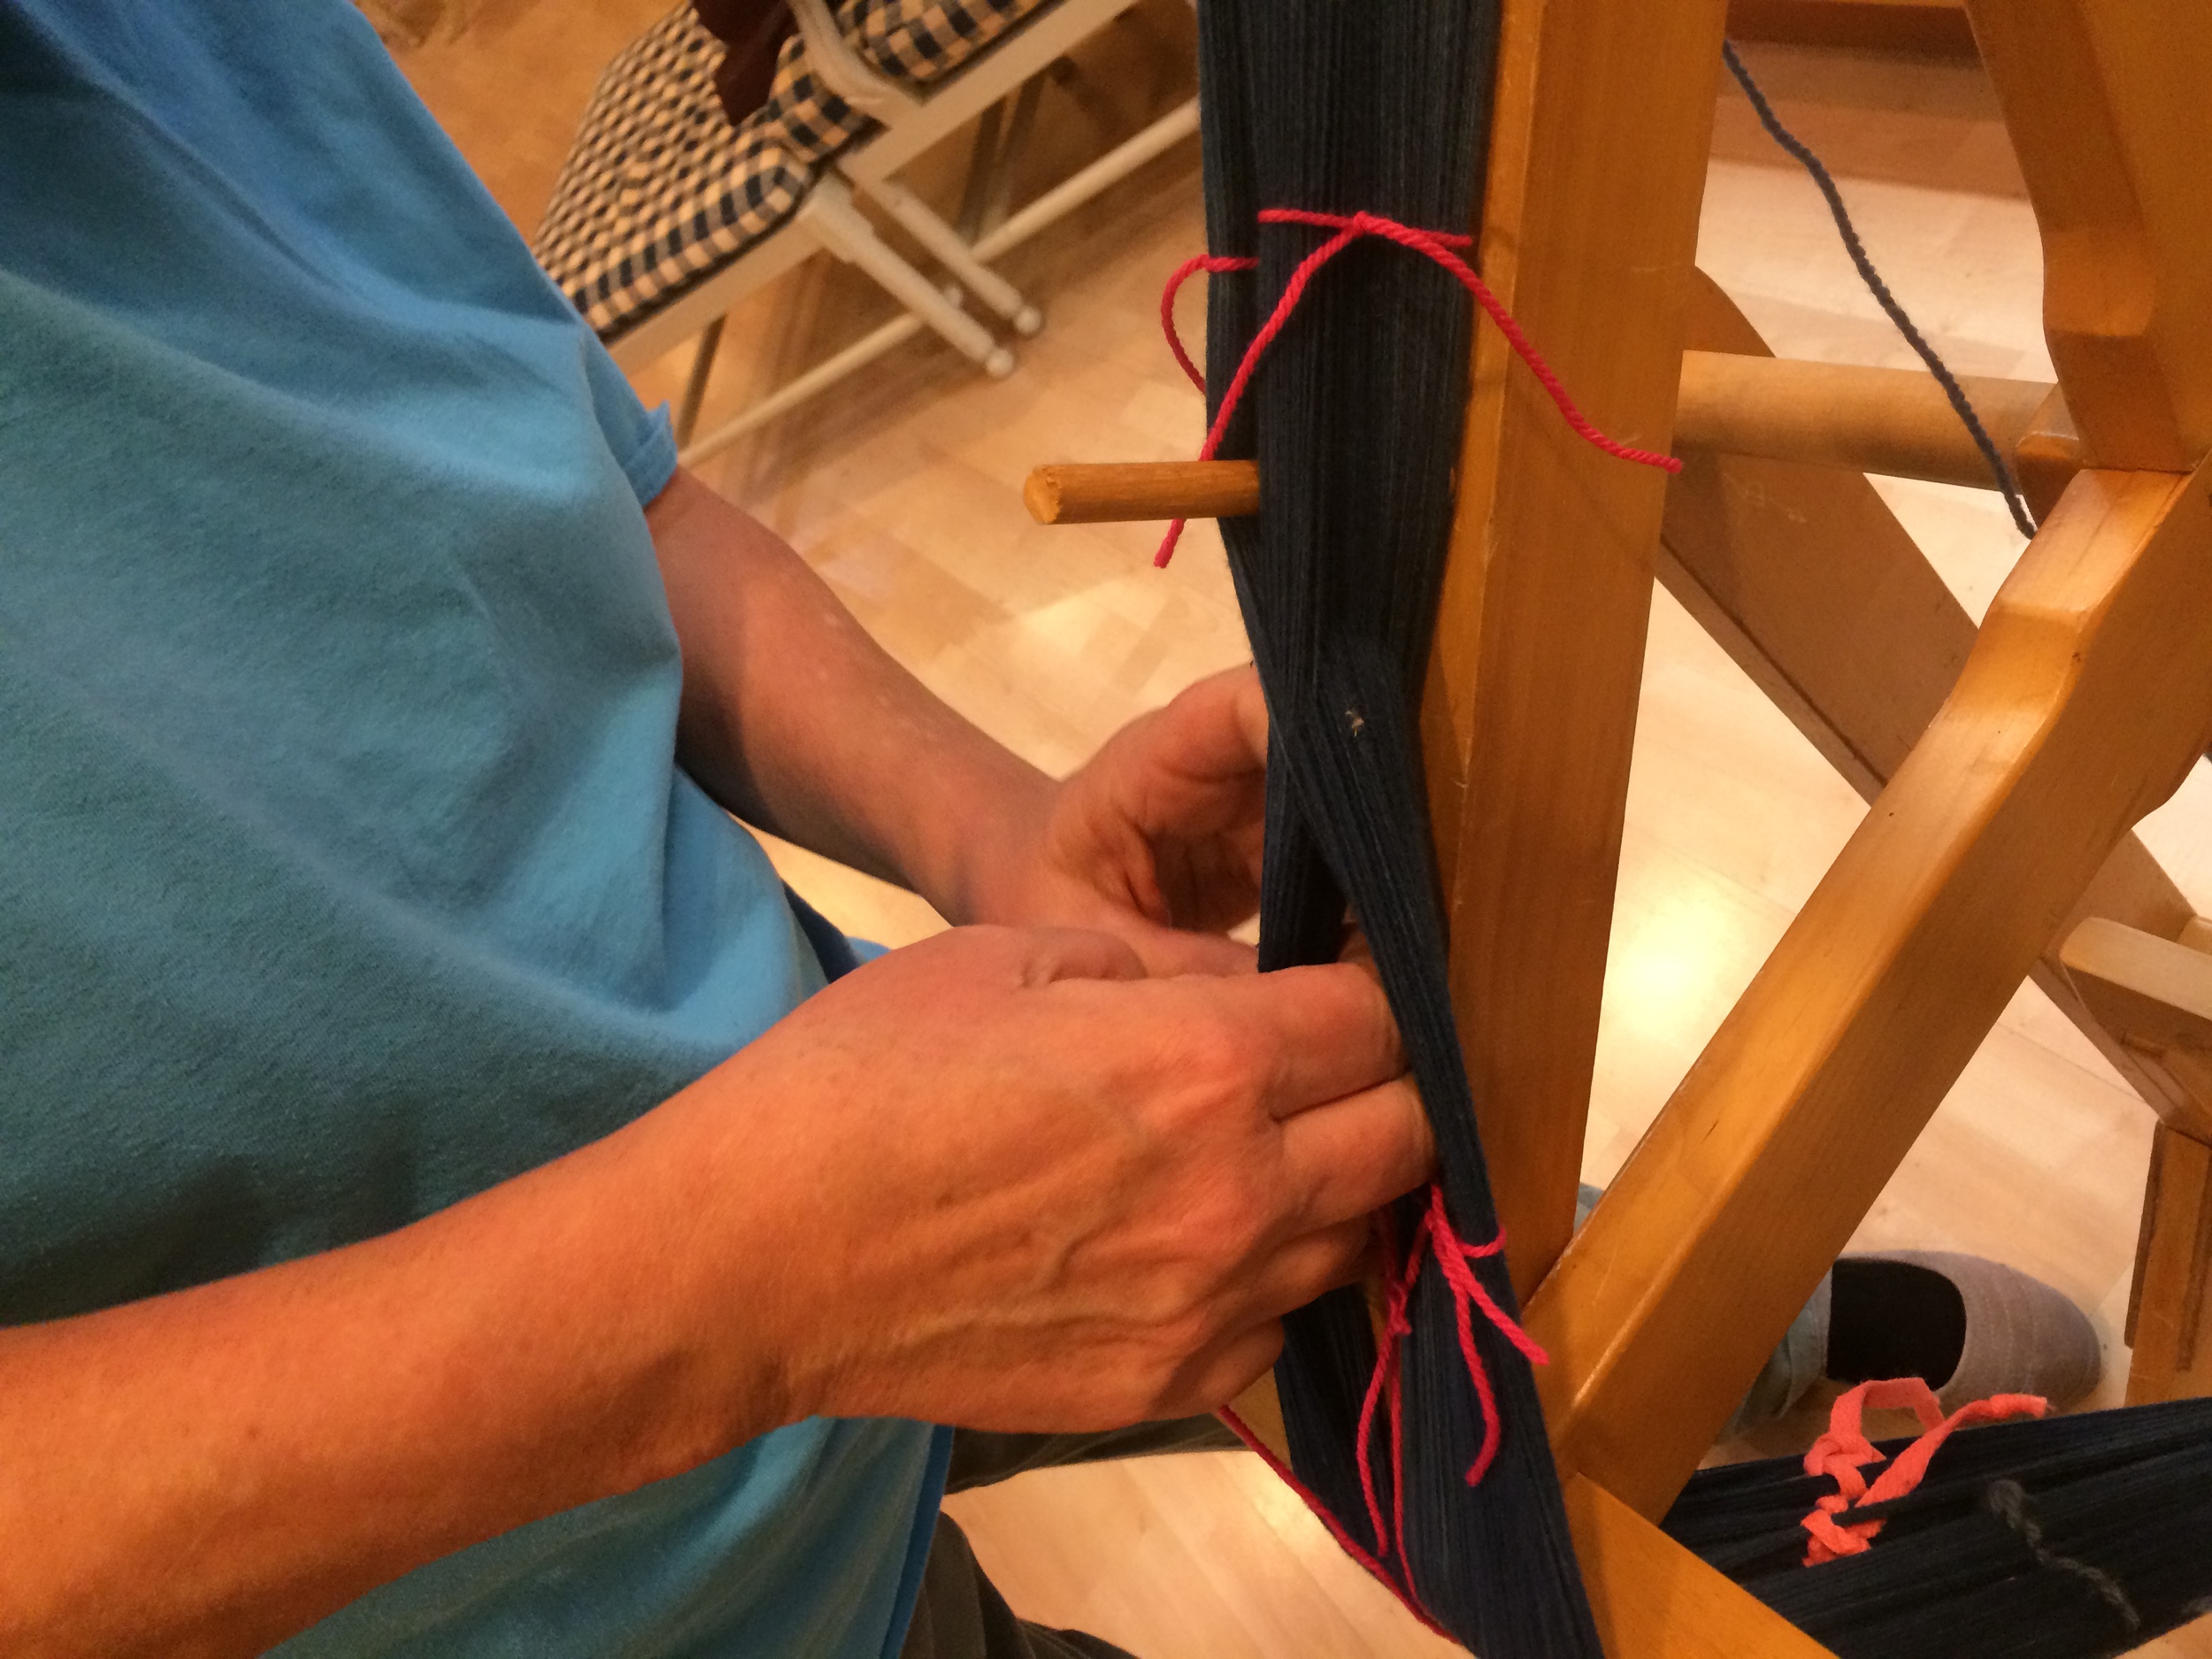
Once all the heddles were threaded and tied off, the warp was centered and tied onto the back beam. The lease sticks were removed from the front cross and the warp was uncoiled. The beam was then turned so the yarns wrapped around the beam, with warp sticks being inserted through the entire warp at every 1/3 turn to keep even tension and prevent tangles. The warp was wrapped until only about 12 inches remained at the front.
To tie the warp onto the front apron rod, the general rule is to hold two bundles of six in each hand (four bundles total) and pull until the tension is even. Then, the bundles in each hand are wrapped over the apron stick, coming up from under and behind the rod and then tied in a tight overhand knot over themselves.
This was first done at both ends of the apron rod to keep it taut. Then, starting from the center and working its way outward towards both ends, we pulled and tied the bundles over the apron rod, keeping as consistent tension as possible and making sure that the reed was centered and all yarns were tied on so they ran straight from the back. Once they were all tied, we lightly touched each section with the back of a hand to test the tension, and tightened or loosened any outliers. When the tension was completely even, the overhand knots on the apron rod were tied into square knots and our warp was tied on!
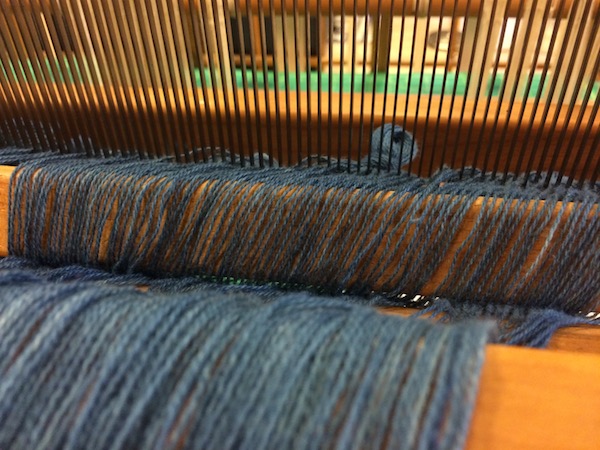
Now, with a few cranks of the front beam, the warp was tight from back to front, evenly going through each heddle and reed, and ready for weaving!
4. Winding the indigo warp yarns

Organic cotton yarns dyed in indigo, on a warping frame.
The reed we are using on our table loom is 22 inches across, and with 10/2 yarn we will need about 24 yarn per inch, 528 yarns in total for the warp, with a length of 4.5 yards. Now that the yarn was nicely wound into balls, we could start measuring out the 528 yarns for the warp. Typically, hand weavers will use a warping frame to do this, which is a rigid rectangular wooden structure with pegs to wind the yarns around, creating the heddle cross to keep each yarn separate. However, this tool is particularly tedious to use for such a large quantity of yarn, and even when mounted on the wall, requires a great deal of shoulder and back endurance.
Fortunately, our weaving expert Lisa had a warping mill, which performs the same function as the warping frame except that it is a cylindrical shaped structure that rotates around a horizontal axis, thereby allowing the weaver to stand in one place and use the rotation of the frame to do the winding.
We wound the guide yard around the pegs, measuring out 4.5 yards and before winding the yarn back in the opposite direction. Then we tied on the end of the indigo-dyed yarn that had been neatly wound into a ball into the upper peg, and holding the yarn in my right hand to keep the tension, began turning the barrel of the mill.
Lisa advised us to wind all the warp at once, or at least, not leave any yarn on the mill to be continued the next day. It is important to keep the tension on the yarn consistent as you wind, to prevent length discrepancies. And to leave it on the mill for even a day makes it susceptible to loosening or even changes in your own mood, which might alter the tension.
I stood there for 3 hours turning the mill and winding the warp, with the yarn cutting through my right finger as it slid across. At every 22 yarns, I would tie two counting strings on either side of the cross to keep track of how many yarns I had tied. After the three hours, I had a beautifully long skein of indigo yarns, each strand individually combed. Lisa tied some secure ties at every few inches of the warp to prevent it from coming apart or moving, and then slipped the whole loop off of the mill. She put one end over her wrist and pulled the rest of the loop through, forming a loose chain to keep the yarns manageable, and we put it to the side to be put on the loom the next day.
Tying off the yarns on warping frame.